Streaming platform is constantly looking for ways to help our broadcasters find the most cost effective solutions that will help them create great looking content and Broadcasts, that said we are proud to introduce the most affordable solution we have found java web server files.
We have recently tested the ATEM Television studio with our HD Wave Broadcaster on our Streaming platform Platform and we were blown away by how powerful this devise was and how easy it was to set up and start broadcasting 시간아 천천히 다운로드. It came with the ATEM Control Panel software rack full with all the features mentioned above. You can have up to 6 HD video feeds giving you a good deal of options check out this solution today at blackmagicdesign.com to see if it is right for you gramblr.
These are the steps that you should follow in order to stream using Atem Studio from Blackmagic:
1. Download and install the black magic ATEM Switchers Installer 3.5 Download directx 11.2.
2. Plug in the ATEM television studio using the USB cable to your PC.
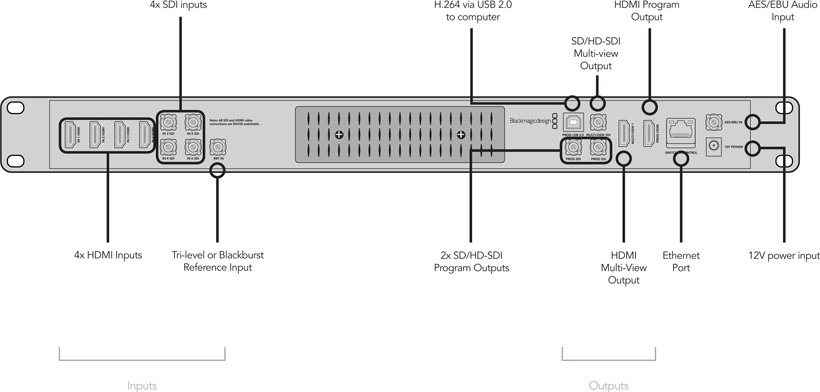
Please see the following image that details all the connectors from the ATEM television studio card:
3 ok.ru 다운로드. Connect the ATEM television studio to your network (into the same switch/router to which your computer is connected).
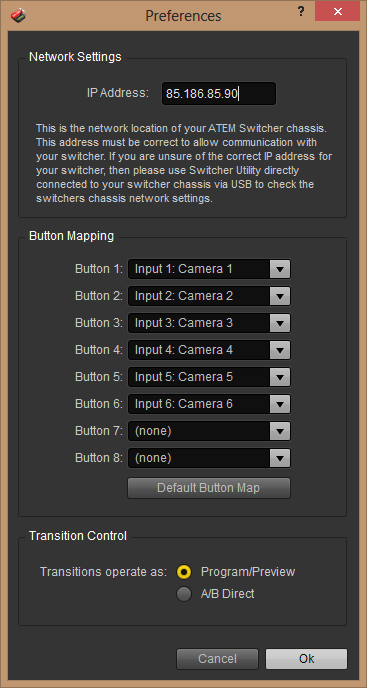
Note: you can plug the ethernet cable on your PC but you will need to assign the following IP to the ATEM television studio: 192.168.10.50 Namo Web Editor fx.
In the image below the IP set to Atem is an IP from our internal network:
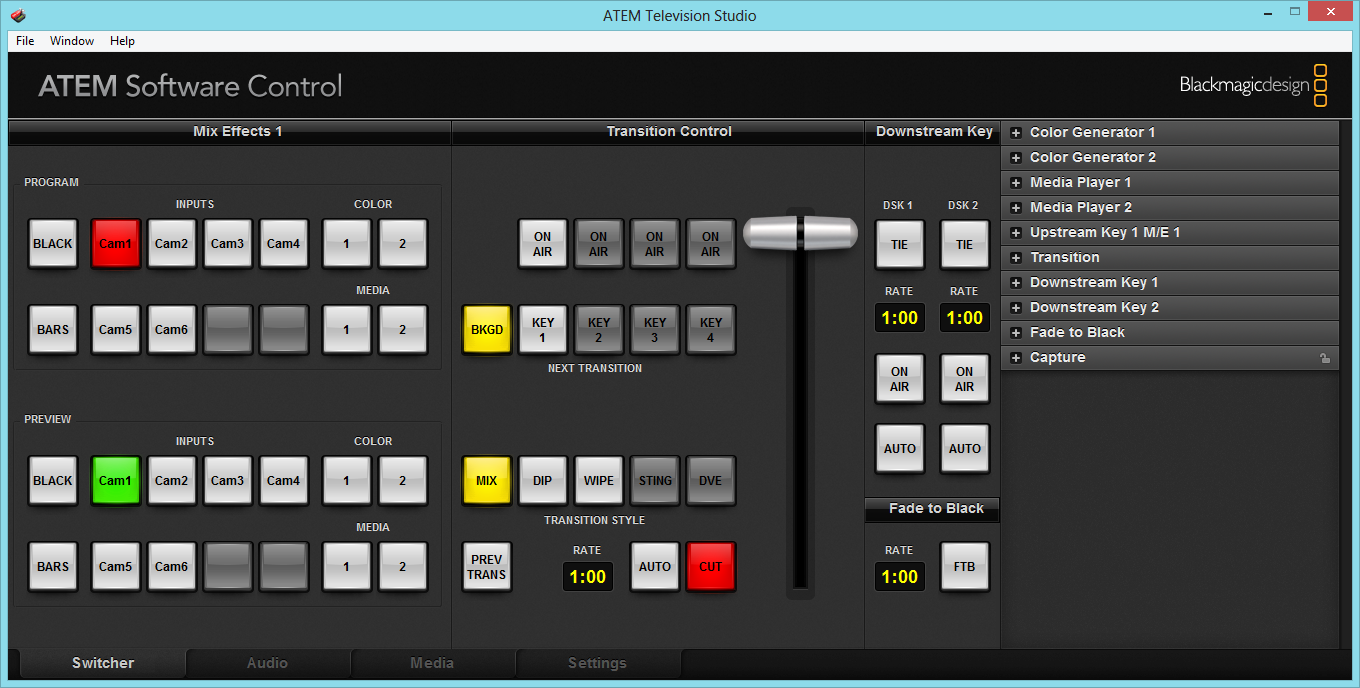
4 감출수 없는 본능 다운로드. Run ATEM Software Control.
5. Click on settings tab.
6. In video change Set video standard to 1080i5994 (this may be different as it depends by the video size that the camera has for output) Download the cherry tree ppt template.
7. Plug in your video sources in inputs using HDMI cables.
8 장터지기 다운로드. Connect HDMI output from Atem Studio into AverMedia capture card 공작 2018 다운로드.
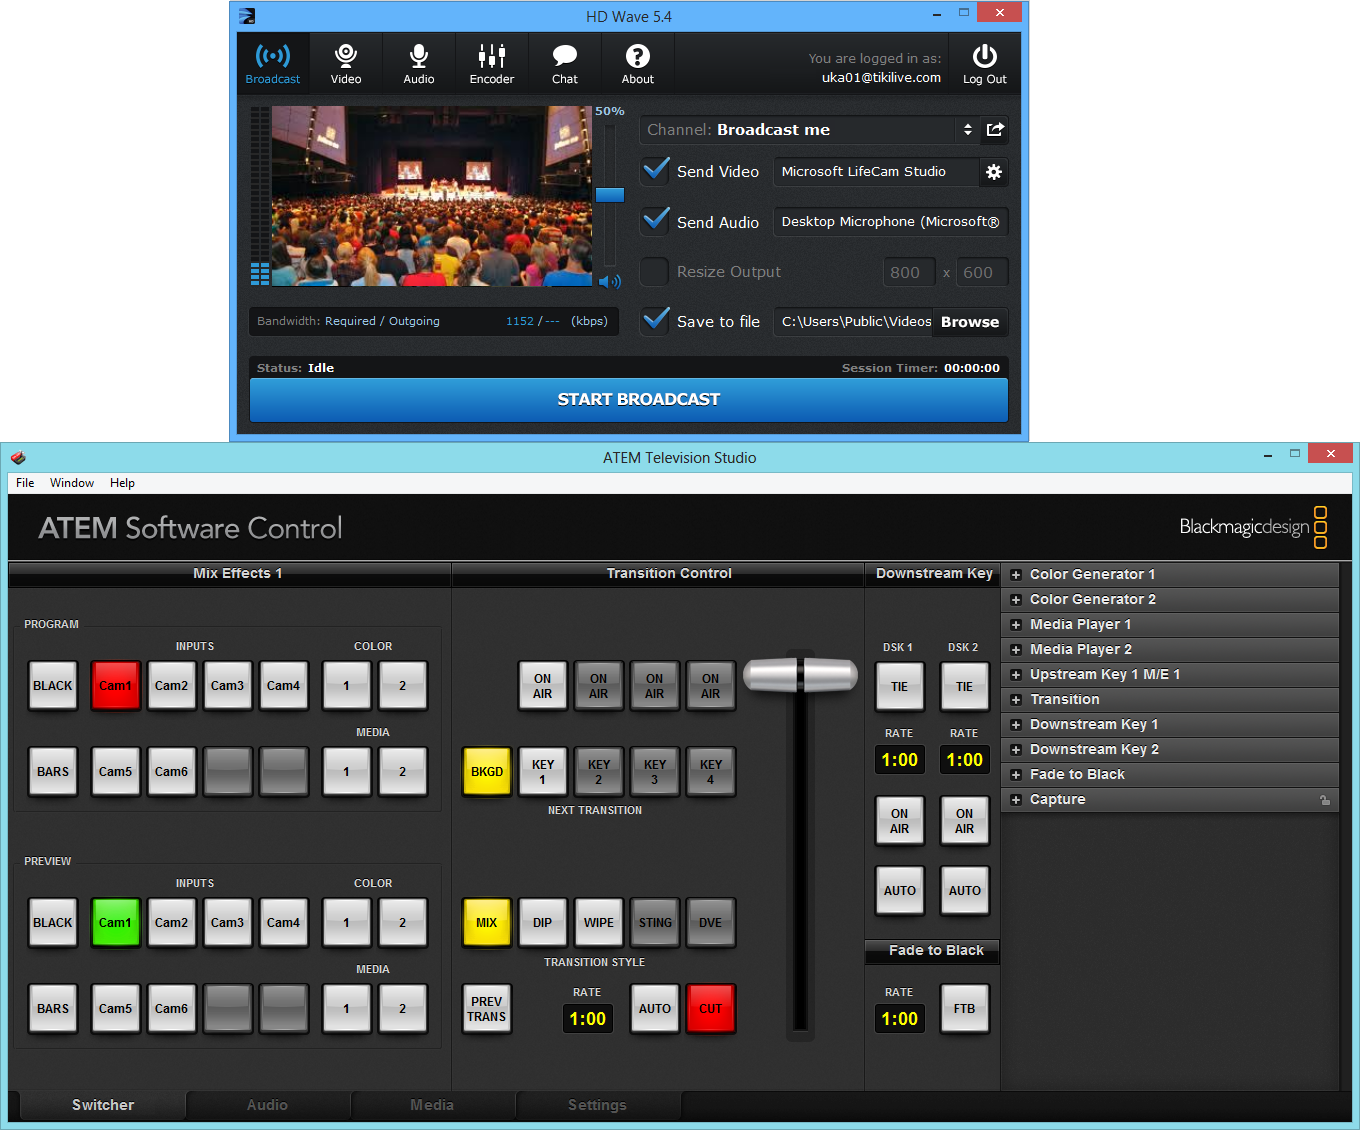
9. Run ATEM Software Control and select the input source that you want to stream with HD Wave: Cam1 in our case.
10. Start HD Wave.
11. Select the following video device: AverMedia BDA Analog Capture Second.
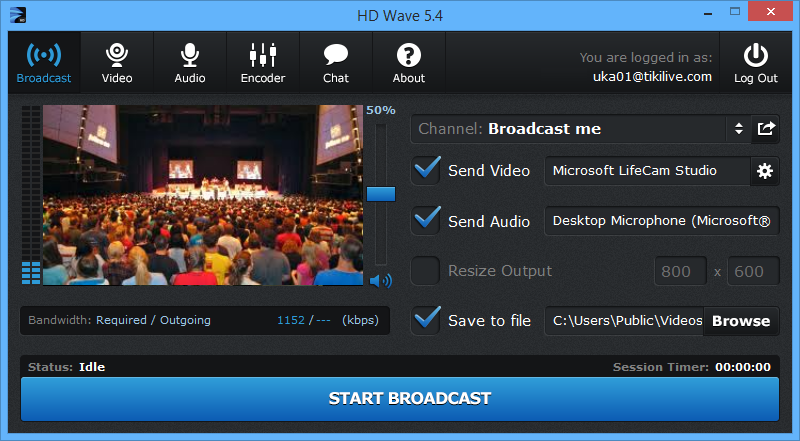
12. Select the format as YUY2 (there are multiple formats listed, the user will have to select each one and notice when the video is available).
13. Select the input size to 1280×720.
14. Select the FPS to 30.
15. Select the bitrate to 1200.
16. Click to Start Broadcasting.
More details you can view on the Blackmagic Design website.