WordPress site owners can manage the general settings for the Appointments plugin and customize them in the way they prefer.
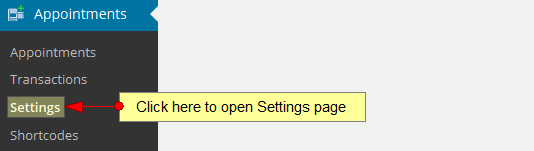
Click on the Settings link, under Appointments menu:
Once the page opens you will land in General Settings section 이별하기 좋은 날씨 다운로드.
Users can customize the time settings, accessibility, display, payment, notification and advanced settings.
In this page we will exemplify how users can manage the most important of these settings: display settings, payment settings and notification settings Maso Store.
Display settings
These settings are mandatory for creating an Appointments page which can also be customized according to your preferences:
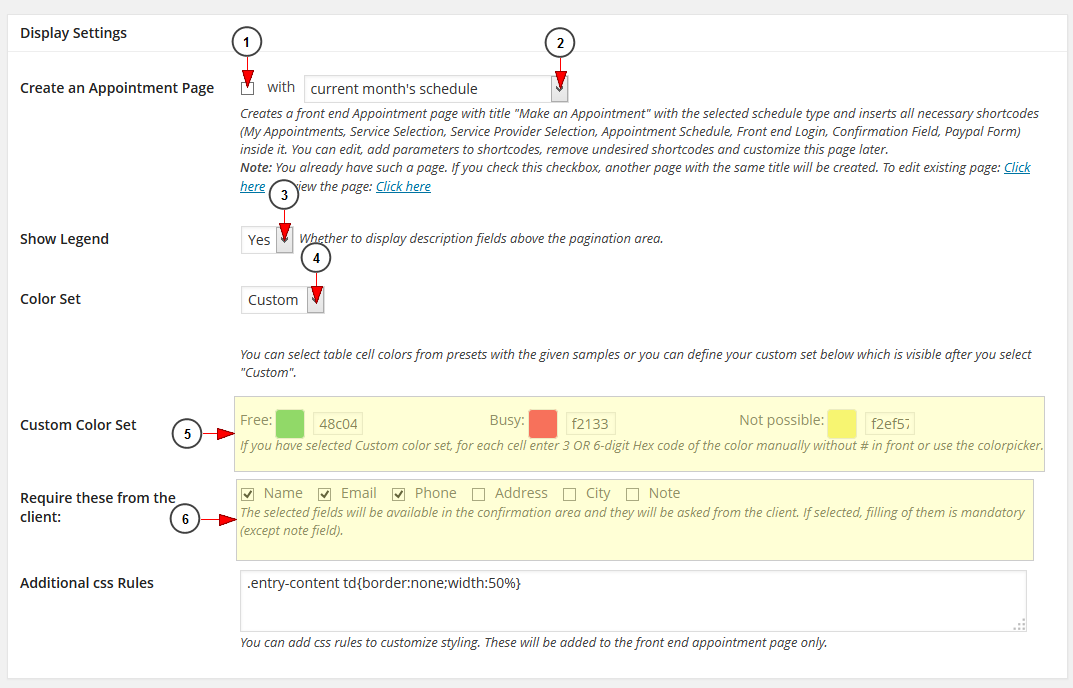
1 Community download. Check this box to create and Appointment page.
Note: once the Appointments page is created it will be displayed in All pages section and you can add it to the top menu to be easily accessed by all users 괴리성 밀리언아서 다운로드.
2. Select from the drop-down menu the schedule type: for current month or week and next month or week.
3 고클린 광고제거 다운로드. Select if you want to display description fields above the pagination area.
4. Select from the drop-down menu one of the existing color presets or select to customize your own color scheme 웹이미지 다운로드.
5. Click on each field and select a color from the Color Picker.
6. Check the boxes for the mandatory details you want users to provide when making an appointment 젠킨스 플러그인 다운로드.
Payment settings
Payments settings are very important if you want users to pay for the appointments they book:
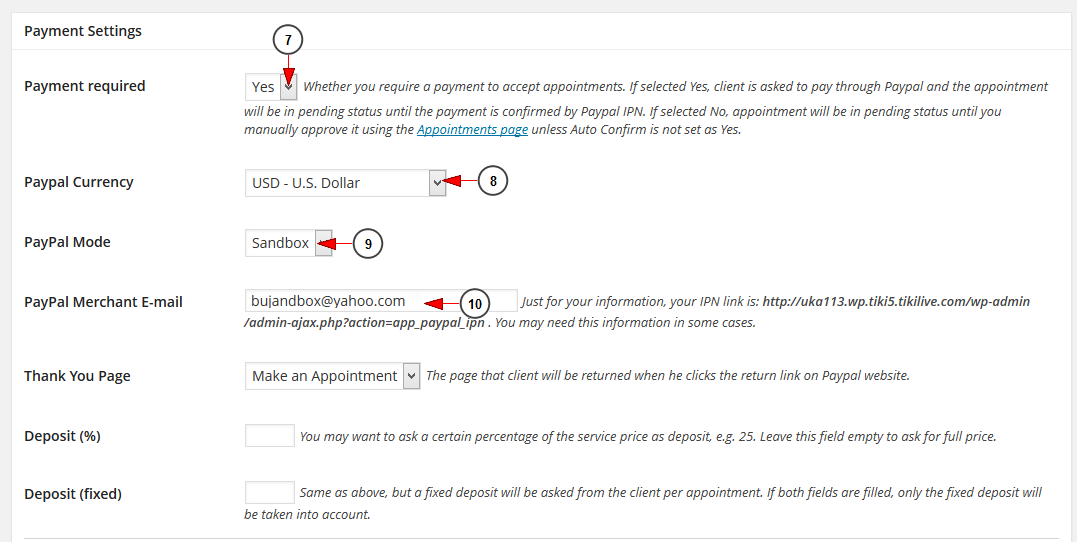
7 Download Age of Empires 2. Select the Yes option from the drop-down menu if you want to require a payment in order to accept appointments.
Note: If selected Yes, client is asked to pay through Paypal and the appointment will be in pending status until the payment is confirmed by Paypal IPN 배트맨 다크 나이트 다운로드. If selected No, appointment will be in pending status until you manually approve it.
8. Select the PayPal currency from the drop-down menu 아비라 한글 다운로드.
9. Select the PayPal mode from the drop-down menu: Sandbox or Live.
10. Insert here the PayPal merchant email address.
Notification settings
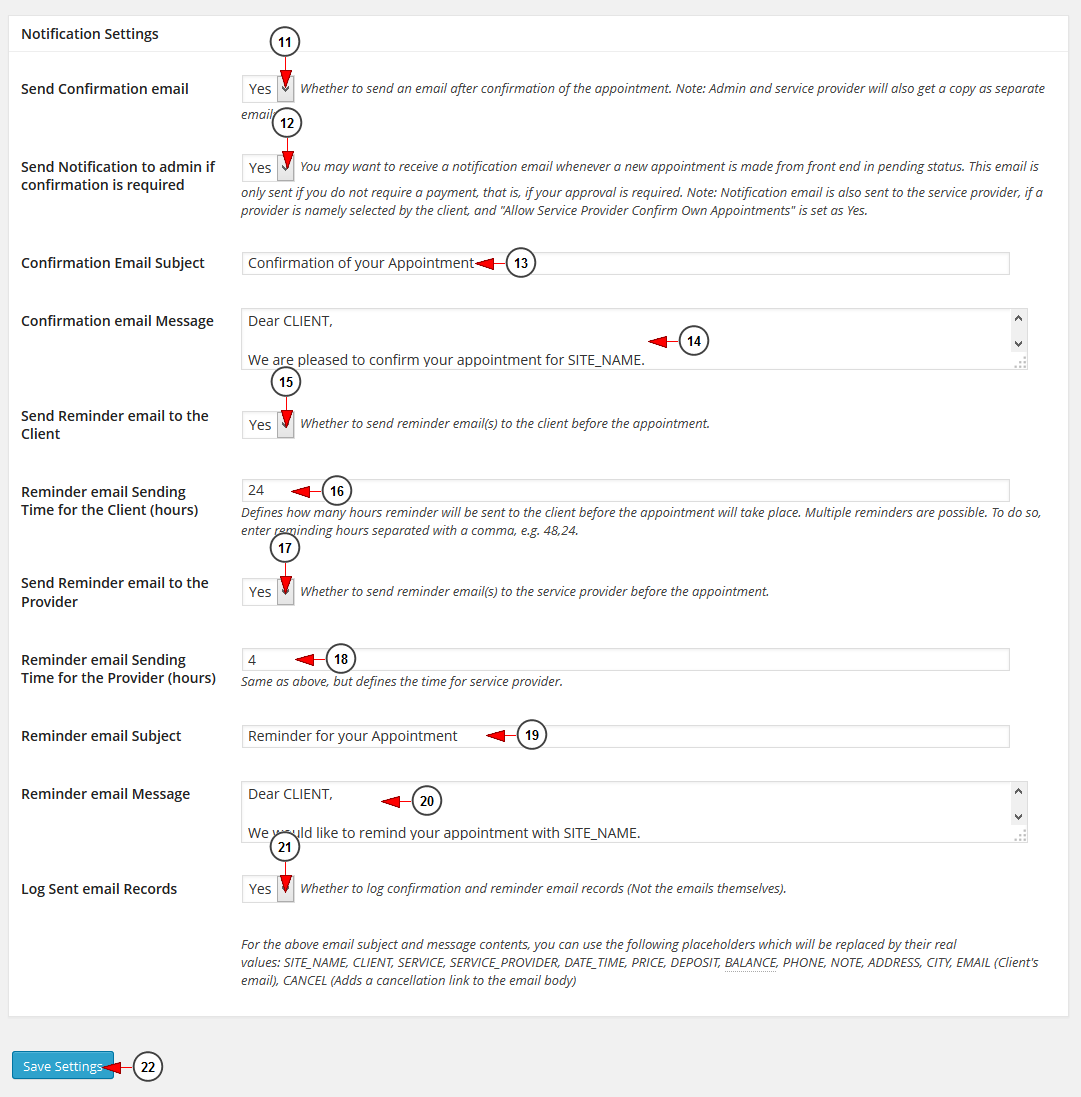
11. Select from the drop-down menu if you want to send a confirmation email for the appointment.
Note: the WordPress site admin and service provider will also get a copy as separate emails.
12. Select from the drop-down menu if you want to receive a notification email whenever a new appointment is made from front end and it requires your approval.
13. Insert here the text for the confirmation email subject.
14. Insert here the text for the confirmation email message.
15. Select from the drop-down menu if you want to send reminder email(s) to the client before the appointment.
16. Insert the number of hours you want for the reminder email to be sent to clients.
17. Select from the drop-down menu if you want to send reminder email(s) to the service provider before the appointment.
18. Insert the number of hours you want for the reminder email to be sent to service provider.
19. Insert here the text for the confirmation email reminder subject.
20. Insert here the text for the confirmation email reminder message.
21. Select from the drop-down menu if you want to log sent email Records.
22. Click here to save the settings.